

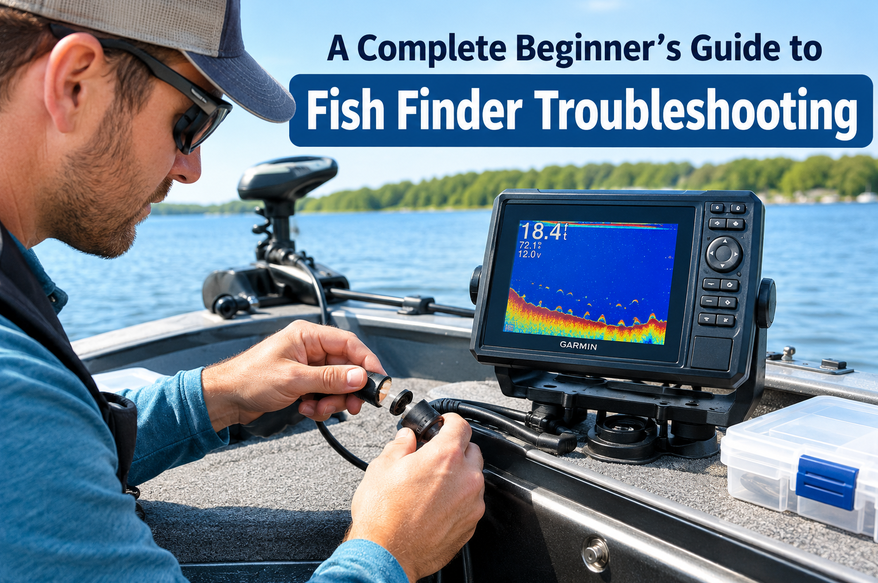
Fish Finder Troubleshooting: 10 Common Errors and How to Fix Them
When your fish finder suddenly loses its depth reading, displays a blank screen, or stops showing fish, it can turn a productive fishing trip into a frustrating experience.
Moreover, few things sour a fishing trip faster than a glitchy sonar screen. Whether it dies at the dock or loses the bottom halfway across the lake, a systematic approach to fish finder troubleshooting solves most problems in minutes.
Fortunately, many common fish finder problems have straightforward solutions that you can try before paying for professional repairs.
This fish finder troubleshooting guide brings together practical advice for diagnosing electrical connections, transducer placement, sonar settings, interference, and manufacturer-specific problems.
On the other hand, through this article, you will learn to fix fish finder common issues such as power failures, no bottom readings, wrong depth, flickering screens and lost readings at speed
1. Fix Fish Finder Not Working at All
If your fish finder is not working, begin with the basics that is checking the power supply and electrical connections.
Loose wires, corroded connectors, damaged fuses, and low battery voltage can prevent the unit from starting or cause it to shut down unexpectedly.
Inspect Wires, Connectors, and Fuses
- Check the wiring: Gently inspect the power leads for loose connections or damaged insulation.
- Examine the connectors: Disconnect power before inspecting connectors for bent pins, moisture, or green and white corrosion.
- Clean carefully: Use an appropriate electrical contact cleaner and a soft brush. Avoid damaging pins or forcing connectors together.
- Test the fuses: Check the fuse and holder for corrosion, a blown fuse, or a loose connection.
- Verify voltage: Use a multimeter to check the supply voltage against the manufacturer’s specifications.
Follow the positive and negative power leads toward the battery to identify loose connections or damaged wiring. If you are unfamiliar with marine electrical systems, ask a qualified marine technician to inspect the circuit.
Prevent Voltage Drops
Larger fish finders with 10-inch or 15-inch displays can be sensitive to voltage fluctuations. If the screen reboots or produces a low-voltage warning when you crank the engine, the power supply may be inadequate or affected by other electrical loads.
Consider a properly sized, dedicated power circuit or battery where appropriate for your boat. Follow the manufacturer’s wiring and fuse requirements, and use marine-grade cable of the correct gauge.
Test for Power
If the basics don’t work, use a test light or multimeter to confirm power is reaching the unit. That means getting under the console or behind the helm and checking every fuse and connection, sometimes tracing the positive and negative leads all the way to the battery.
Your goal is to find the break in the circuit and fix it. This is also the first step if your Lowrance Hook2 not turning on is the problem, or if you need a Humminbird Helix screen blank fix.
Both usually come down to power, a loose plug or a corroded connection rather than a failed display.
2. Fix a Fish Finder That Turns On but Shows No Bottom
A fish finder can power up normally while failing to display depth.
In many cases, the problem involves the transducer connection, incorrect sonar settings, physical damage, or poor transducer positioning.
Check the Transducer Connection
Make sure the transducer plug is fully seated and locked into the correct port. Some units display a no-transducer warning, while others simply stop returning bottom information. A visible water-temperature reading may indicate that part of the transducer connection is active, but it does not guarantee that the sonar element is functioning correctly.
Inspect the Transducer
Transom-mounted transducers often use breakaway brackets that can move after hitting debris, running aground, or loading the boat onto a trailer. Check that the transducer remains securely mounted and correctly positioned.
Also inspect its face for algae, barnacles, scratches, or other debris. Fouling can weaken sonar performance, while damaged cables, crimps, and corrosion can interrupt the signal entirely.
Never operate a transmitting transducer out of the water unless the manufacturer explicitly permits the procedure. Dry operation can damage some transducers.
3. Troubleshoot Garmin Fish Finder Not Reading Bottom or Showing No Depth
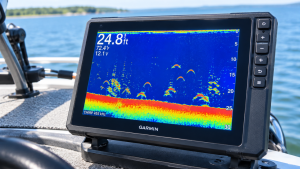
Garmin Marine Flashing Depth or No Bottom
If you experience garmin marine flashing depth or no bottom, inspect the physical installation and verify the sonar configuration. Cavitation, a dirty transducer, damaged cabling, or incorrect frequency settings can produce inconsistent depth readings.
On compatible Garmin chart plotters, open the sonar screen and check whether transmission is enabled. If transmission is disabled, turn it on through the sonar settings.
Garmin ECHOMAP No Bottom Reading
For a garmin echomap no bottom reading issue, confirm that the correct transducer model and frequency are selected.
Garmin units may automatically identify compatible transducers, but a model connected incorrectly or identified improperly may require manual selection.
- Open the sonar screen and select its settings or options menu.
- Check the displayed transducer model.
- Compare it with the model number printed on the transducer cable tag.
- Select the correct model if manual selection is supported.
- Verify that the chosen frequency is supported by the transducer and appropriate for the water depth.
On supported Garmin models, restoring sonar defaults can help resolve persistent configuration problems. This resets sonar settings, but the precise menu and behavior depend on the device. Consult the manual before changing installation settings.
Garmin Striker Transducer Not Reading Depth
When diagnosing a garmin striker transducer for no depth reading problem, check the connector, transducer position, selected frequency, and transmission settings.
On compatible Striker models, test traditional sonar in open water and confirm that the transducer is submerged.
On the other hand, if the fish finder unit powers up but shows nothing, the transducer is the usual culprit.
So, just follow these steps to fix those issues:
Step 1: Confirm the Transducer Connection
Many units show a “no transducer” message, but not all do, so go straight to the plug and make sure it is seated properly. If you see a temperature reading but no bottom, the transducer is connected, and its position or condition is the likely issue.
Step 2: Check the Transducer Itself
- Kick-up brackets: most transducers are mounted on breakaway brackets that flip up if you hit something or run aground. Feel it and confirm it’s back in position.
- Marine growth: in a wet slip, barnacles and algae degrade readings, though they rarely kill them completely.
- Cable damage: check the cable and any extensions for cuts, kinks, crimps or corrosion, especially after storage, since mice and bends can do real damage.
- Water in the display: moisture inside a unit means a failed seal, which is a warranty repair.
Never run sonar out of the water, as it gives no reading and can damage the transducer.
Step 3: Verify Garmin Sonar Settings
Garmin Support recommends a short settings check for any flashing depth or missing bottom. If you see “transmission disabled” in the lower left corner, open Options or Settings and toggle transmit on. Next, confirm the transducer model and frequency.
Most Garmin transducers auto-detect, but if the wrong one shows, you can change it manually using the model tag on the cable, typically 4 to 6 inches from the plug. A wrong frequency can also produce no bottom return, so choose a higher frequency for shallow water and a lower one for deep water. If problems persist, restore the sonar defaults, which won’t erase your user data.
The same checks apply when you need a Garmin Striker transducer for no depth reading fix. Confirm the connection, model and frequency before buying a new transducer.
4. Fix Lowrance Fish Finder Depth Problems
Lowrance HDS 12 Pro Not Reading Depth
If your lowrance HDS 12 pro not reading depth, begin by checking power, the transducer connection, the selected sonar source, and the correct transducer configuration. Inspect the cable for cuts, crushed sections, and corrosion.
Also verify that the transducer is compatible with your particular HDS model.
If the unit displays sonar information but cannot establish a bottom return, check the installation and settings before assuming the display or transducer has failed.
Lowrance Hook2 Not Turning On
For a lowrance hook2 not turning on issue, inspect the battery, fuse, power cable, and connector. Use a multimeter to check whether the unit receives the required voltage under the conditions specified in its manual.
If power reaches the device but it remains unresponsive, consult Lowrance support before attempting internal repairs.
Lowrance Fish Finder Gives No Reading in Shallow Water
A fish finder gives no reading in shallow water when the selected depth range is poorly matched to the actual conditions or the sonar struggles to separate the bottom return from surface noise.
One Lowrance troubleshooting demonstration shows how a unit displaying an automatic 400-foot range failed to return the bottom in approximately 3.5 feet of water. Changing the range to a shallow setting, such as 5 feet, restored the reading. The exact menu and available ranges vary by model.
Use automatic depth range when it works correctly. In very shallow water, select an appropriate shallow range if necessary, and return to automatic adjustment when conditions change.
5. Resolve Humminbird Screen and Restart Problems
Humminbird Helix Screen Blank Fix
For a humminbird helix screen blank fix, first determine whether the unit is completely unpowered or whether the display is blank while the device still appears to operate.
- Check the battery voltage and power connections.
- Inspect the fuse and fuse holder.
- Confirm that the power cable is fully seated.
- Disconnect power before inspecting connectors for corrosion.
- Consult the manual for model-specific reset and recovery procedures.
Humminbird Fish Finder Keeps Rebooting
If your humminbird fish finder keeps rebooting, investigate voltage drops, loose power connections, an overloaded circuit, and damaged cables. Large 10 and 15-inch screens draw a lot of power and react badly to voltage drops.
If the problem started after a software update or accessory installation, verify firmware compatibility and the connections of integrated devices.
Do not assume the display itself has failed until you have ruled out power and wiring issues.
Make sure the battery powering the unit is fully charged. If you see a low voltage alarm when you crank the motor, the unit is probably sharing a battery with other loads.
The fix is a dedicated battery for the fish finder, wired directly with an inline fuse rather than through a switch panel or shared power block.
Powering your sonar from a battery that also runs the engine, charges phones and cranks the motor invites electrical noise.
A direct, dedicated connection reduces it. Sonar interference can also come from a nearby boat or kayak buddy running the same frequency. Changing frequency often clears it up. Vertical lines across the screen are typically electrical noise, not fish.
Use marine-grade wire in the gauge your manual specifies. Tinned marine cable resists oxidation, while random wire from the shop can cause voltage loss and corrosion.
A professional install isn’t automatically a correct one, so if you find a problem, take it back to the installer.
6. Correct Transducer Mounting Height and Position
Transducer mounting height for accurate readings is essential because the transducer must receive a clean sonar signal through the water.
A transducer mounted too high may lose contact with the water, while poor alignment can create turbulence and cavitation.
Check Alignment and Mounting Stability
- Position the transducer according to the manufacturer’s mounting instructions.
- Check that the mounting angle is appropriate for the hull and operating conditions.
- Inspect the bracket for movement, vibration, or damage.
- Ensure nearby hull fittings, steps, or other obstructions are not disrupting water flow.
- Secure and route cables away from sharp edges and moving components.
A transducer mounted on a kayak’s adjustable side arm may need its angle checked under forward motion. Water pressure can change its position, potentially reducing the quality of the sonar return.
Getting Accurate Readings: Mounting and Placement
Many sonar complaints trace back to the transducer’s position. Understanding transducer mounting height for accurate readings saves a lot of frustration.
- Keep it parallel and level to the water’s surface.
- Set the trim on kayak swing-arm mounts, because water pressure at speed can flip the transducer out of alignment.
- Keep it in the water column, and lower the 2D transducer slightly so it stays submerged.
- Avoid vibration from loose or poorly chosen mounting materials.
- Check the transducer type, since single-frequency, CHIRP and dual-frequency units each need the matching transducer, a common problem with secondhand gear.
Why a Fish Finder Loses Depth at Speed
If your fish finder transducer not reading at speed, turbulence, aerated water, and cavitation around the transducer may be responsible.
A fish finder loses depth at speed when the transducer cannot maintain a reliable signal as the boat moves faster.
First, check the mounting angle and height. Minor adjustments may help, but they do not solve every high-speed problem.
Some boaters use a compatible high-speed 2D transducer alongside a separate imaging transducer. A manufacturer-approved splitter or adapter may be required, depending on the equipment.
Verify compatibility before buying components, since connectors and sonar sources are not universally interchangeable.
If you cannot maintain a reliable reading after careful adjustments, consult a marine electronics installer. Through-hull or other specialized installations may provide a better solution for particular hull designs.
This fish finder transducer not reading at speed issue is among the most common complaints. You leave the ramp, hit 10 to 15 mph, and the depth vanishes.
A fish finder transducer not reading at speed often has two causes: cavitation from poor placement, and a large side imaging transducer that simply isn’t built for planing speeds.
On many boats, a transom-mount transducer will lose its reading at 20 to 30 mph. Adjusting its angle and height can help, but the real fix may be a through-hull transducer installed by a pro
Related to this circumstance, if your fish finder loses depth at speed, the solution is a compatible high-speed 2D transducer and a splitter cable that separates 2D sonar from side and down imaging.
So, you can add an adapter for the plug type, a splash shield and a mounting board, and the depth readings held at full speed.
It costs a few hundred dollars, and many splitter cables don’t work with every unit, so verify compatibility with your model first
7. Improve Sonar Settings and Image Clarity
Adjust Sensitivity and Contrast
If sensitivity is too high, the display can become cluttered with unwanted returns. If sensitivity is too low, fish and bottom details may disappear. Modern units often provide useful automatic settings, making them a sensible starting point.
Try automatic sensitivity first. If the image remains unclear, make small adjustments while watching how the display changes.
For fish finder settings for clear water, start on auto and avoid pushing sensitivity too high, which creates a hot, washed-out image.
Use a higher frequency in shallow water for tighter, crisper arches and a lower frequency for deeper water and wider coverage. Fine-tune from there.
Water depth, bottom hardness, suspended debris, and the sonar frequency all influence the image.
In water filled with leaf litter or other debris, reducing sensitivity slightly may help separate useful targets from clutter.
Choose an Appropriate Sonar Frequency
On compatible systems, higher frequencies generally provide useful detail in shallower water, while lower frequencies can be advantageous at greater depths. The available options depend on the transducer and fish finder.
Traditional 200 kHz sonar generally offers a narrower beam than 77 kHz sonar on systems with those options.
A narrower beam can improve target separation, while a wider beam covers a larger area. CHIRP sonar sweeps across a range of frequencies rather than transmitting at just one frequency.
Understand Sonar Clutter and False Returns
Surface clutter can result from waves, bubbles, current, algae, and other conditions near the water’s surface. These reflections can obscure targets in the upper water column.
Adjusting sensitivity and other supported sonar settings can reduce unwanted clutter.
If your fish finder shows false readings, inspect the transducer, check for interference, and review the selected frequency and sensitivity.
Do not assume every mark on the screen represents a fish.
8. Diagnose Interference, Software, and Cable Damage
Reduce Electrical and Sonar Interference
Electrical interference may come from nearby equipment, poor wiring, or voltage fluctuations. Sonar interference can also occur when nearby fish finders use overlapping frequencies.
Check cable routing, grounding and power recommendations, and the condition of connectors. If another boat’s sonar appears to affect your display, try a different supported frequency or interference-rejection setting.
Update Software and Inspect Cables
Outdated firmware can sometimes contribute to performance problems. Check the manufacturer’s official support resources for updates appropriate to your model and connected accessories.
Inspect the transducer cable for cuts, kinks, pinched sections, or damage caused by storage. Check connectors and battery terminals for corrosion.
If water has entered the display housing, stop using the device and seek professional service; a failed seal may require repair under warranty.
9. Understand Common Fish Finder Display Symptoms
Fish Finder Showing Wrong Depth
If your fish finder showing wrong depth, check the transducer installation, sonar frequency, depth range, and units of measurement.
Compare the reading with known water depth only when conditions and measurement references are understood.
Fish Finder Not Showing Fish
A fish finder not showing fish does not necessarily mean fish are absent. Sensitivity may be too low, sonar clutter may obscure targets, or fish may be outside the beam.
When your fish finder is not showing fish, check these before blaming the unit:
- Boat speed: for the best sonar images, travel at 1 to 3 mph. Drifting slowly with the wind gives poor images.
- Sensitivity and contrast: too high gives a washed-out “hot” image, and too low darkens the screen so targets vanish.
- Firmware: check the manufacturer’s website for updates, including for connected accessories.
Remember that traditional sonar records echoes over time, so the display represents recent sonar history rather than a camera view of the water.
Fish Finder Screen Flickering and False Readings
A fish finder screen flickering may indicate unstable voltage, a loose connector, electrical interference, or a display fault.
A fish finder that shows false readings often means interference, surface clutter or a sensitivity setting that is too high.
Surface clutter comes from waves, bubbles, current and algae reflecting sonar too quickly for the unit to process, creating a blind zone near the surface. A higher frequency reduces that blind zone.
Check the power supply first and note whether the problem occurs when starting the engine or switching on other equipment.
Fish Finder Bottom Reading Jumping
When your fish finder bottom reading jumping, investigate turbulence, poor transducer alignment, changes in depth, and intermittent cable connections.
If the issue occurs only at higher speeds, prioritize mounting and water-flow conditions.
On the other side, if your fish finder is showing wrong depth or your fish finder bottom reading is jumping, check the transducer for fouling or scratches, then look at cavitation from speed or poor placement and for damaged cabling. Also confirm the range setting, because a locked range can cause confusing displays.
10. Reading Sonar Correctly
Sonar shows a cone, not a pinpoint beam, so a fish that looks directly below you may be several feet to the side.
Full arches typically indicate active fish, thick blobs are usually bait or stacked fish, and straight vertical lines are usually electrical noise.
Quick Diagnostic Order
- Power and connectors
- Transducer connection and position
- Range, frequency and sensitivity
- Firmware and defaults
- Professional help or replacement
Frequently Asked Questions
Basic troubleshooting can identify many common problems, but not every fault can be fixed at the boat ramp.
Seek professional assistance when wiring damage is extensive, the display has water intrusion, the transducer is physically damaged, or the unit continues to fail after the recommended checks.
Before replacing components, record the model number, transducer model, error messages, water depth, and boat speed when the fault occurs. This information can help a technician identify the cause more efficiently.
Why does my fish finder turn on but show no depth?
Common causes include a loose transducer connection, incorrect sonar settings, a damaged cable, a dirty transducer, or poor mounting. Check these items before replacing the unit.
Can a low battery cause fish finder problems?
Yes. Low voltage or voltage drops can cause shutdowns, restarts, alarms, and unreliable operation. Check the battery and wiring against the manufacturer’s specifications.
Why does my fish finder stop reading at high speed?
Water turbulence, cavitation, and poor transducer positioning can interrupt the sonar signal. Check the mounting arrangement and consult an installer if adjustments do not help.
Should I always use automatic sensitivity?
Automatic sensitivity is a good starting point for many modern fish finders. Manual adjustments may improve clarity when conditions change or unwanted clutter is present.
Can I test my transducer outside the water?
Do not transmit sonar out of the water unless the manufacturer specifically allows it. Some transducers can be damaged by operating without adequate water contact.
Why is my fish finder not turning on?
Check wires, connectors, fuses and battery terminals for looseness or corrosion, then test for power with a multimeter or test light.
Why does my fish finder show no bottom reading?
The most common causes are an unplugged or damaged transducer, a kicked-up bracket, a disabled transmit setting, the wrong model or frequency, or a depth range set too deep for shallow water.
Why does my fish finder lose depth at speed?
Cavitation, poor placement, or a transducer not designed for speed. Adjust position, install a high-speed 2D transducer, or ask a pro about a through-hull unit.
Why does my fish finder keep rebooting?
Usually voltage drops from a shared battery or poor wiring. Use a dedicated battery, correct marine-grade wire and clean connections.
Should I use auto or manual settings?
Auto works well for most conditions. Adjust manually only for clutter, unusual bottoms or special conditions.
Conclusion: Get Your Fish Finder Working Again
Effective fish finder troubleshooting starts with simple, systematic checks. Inspect power connections, fuses, battery voltage, and transducer cables before moving on to sonar settings, frequency selection, and mounting problems.
In a simple word, a good fish finder troubleshooting follows a logical path: power first, then the transducer, then settings. Most not working fish finder units turn out to be loose plugs, corroded terminals or a depth range left on the wrong setting, and fixing them costs nothing.
For Garmin, Lowrance, and Humminbird devices, use the correct model-specific instructions rather than assuming every unit has identical menus or compatible accessories. When depth disappears at speed, focus on transducer placement and water flow. When the display becomes cluttered, review sensitivity and interference.
Key Takeaways
-
- Check power, wiring, connectors, fuses and corrosion before anything else.
- Make sure the transducer is compatible, connected, clean, and correctly positioned.
- Verify transmission, model and frequency, and restore defaults if needed
- Use automatic sensitivity as a starting point and tune manually only when needed.
- Investigate voltage drops and interference when the screen flickers or reboots.
- Seek qualified marine electronics support for persistent faults or damaged equipment.
- Use a dedicated battery to prevent reboots, flicker and voltage alarms.
- Confirm the transducer is plugged in, mounted level and submerged.
- Set the depth range to match shallow water, then return to auto.
- For speed problems, consider a high-speed transducer or a through-hull install.
A few careful checks can often restore reliable depth readings and help you spend less time troubleshooting and more time fishing.
