
Fast and Slow Pitch Jigging Technique: A Step by step Full Gear Setup
Jigging is one of the most effective ways to catch offshore fish. Many anglers get confused about the differences between its two main styles. The fast and slow pitch jigging technique looks similar from a distance
But, the gear, jig design, rhythm and target species are very different.
Learning the fast and slow pitch jigging technique can help you catch a wide range of predatory fish, from kingfish, amberjack, and tuna to snapper, grouper, and other reef species. Although both methods use metal jigs to attract fish, they rely on different movements, equipment, and presentations.
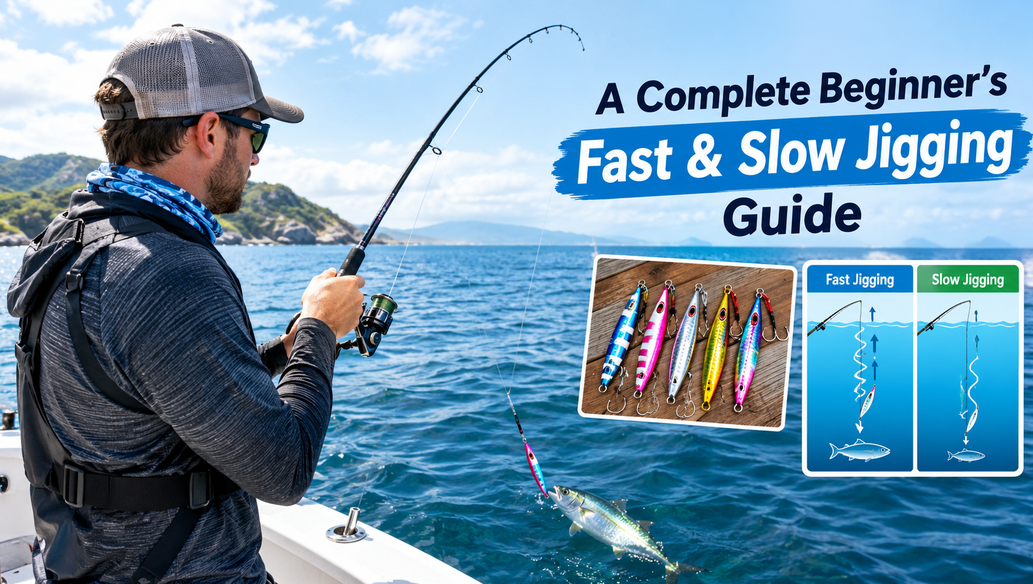
Fast pitch jigging uses quick, powerful rod lifts combined with rapid reeling to create an aggressive, erratic action.
Slow pitch jigging, on the other hand, focuses on controlled rod movements and a fluttering fall that imitates a wounded baitfish. Understanding when and how to use each technique can make your offshore fishing trips more productive.
In this guide, you will learn the equipment you need, how to select the right jig weight, and how to perform each retrieve step by step.
Whether you are exploring the fast and slow pitch jigging for beginners approach or refining your existing skills, these practical tips will help you develop a more effective jigging system and choose the right setup and start catching fish
What Is Fast Pitch Jigging?
Fast jigging, often called mechanical jigging, is an active fishing technique designed primarily for targeting powerful pelagic and reef-associated predators. Anglers commonly use long, relatively heavy metal jigs with an aggressive vertical presentation to trigger reaction strikes.
It targets deep pelagic and pelagic reef species such as kingfish, amberjack, dogtooth tuna and other hard-fighting fish that patrol deep reefs and offshore waters.
Slow pitch jigging uses lighter, center-weighted jigs that flutter on the drop, and it targets bottom-dwelling predators like snapper that eat bait.
- Fast jigging: physical, rhythmic, aimed at powerful pelagics.
- Slow pitch jigging: finesse-based, aimed at demersal (bottom) fish, with most bites coming on the fall.
Essential Gear for Fast Pitch Jigging
A typical fast pitch setup includes a strong jigging rod, a suitable spinning or overhead reel, braided fishing line, a leader, and a heavy metal jig. Here, you can use knife-style jigs weighing approximately 200–300 grams, although the appropriate weight depends on depth, current, and tackle ratings.
- Jigging rod: Choose a rod rated for the jig weight and the fish you expect to encounter.
- Reel: Use a reel with dependable drag, sufficient line capacity, and smooth operation under pressure.
- Jigs: Long, relatively heavy metal jigs are commonly used to create a fast, erratic action.
- Gimbal belt: Helps distribute pressure and provides support when fighting powerful fish.
- Jigging gloves: Improve comfort and help protect your hands while handling tackle and line.
A sound fast pitch jigging rod and reel setup pairs a stout, fast-recovery rod with a reel that picks up line quickly and has a strong drag.
For fast pitch jigging reel gear ratio recommendations, a higher-speed reel that is generally around 6:1 or higher is a common choice, because you are winding with every lift. This is general guidance rather than a fixed rule, so match it to your rod, line and target species
How to Perform Fast Pitch Jigging
If you want a simple fast pitch jigging technique for beginners, follow these steps:
- Locate the fish: Use your fish finder or sounder to identify baitfish and promising offshore structure.
- Drop the jig: Lower the jig toward the bottom while controlling the spool to reduce the risk of an overrun with an overhead reel.
- Start the retrieve: Once the jig reaches the desired depth, lift the rod quickly while turning the reel handle.
- Build a rhythm: Coordinate the rod lift and reeling motion. Begin at a manageable pace before gradually increasing speed.
- Maintain the action: Work the jig through the target zone, adjusting the retrieve to suit the conditions and fish response.
- Fight the fish: When a fish strikes, maintain pressure and keep it away from reefs and other structure.
In the simple explanations, mark bait or fish on your sounder and drop the jig down, thumbing the spool so you avoid an overrun. Once on the bottom, lift the rod quickly and use your other hand to wind at the same time. Build a steady rhythm. It takes a little time to coordinate your hands, but it becomes natural. Slowly increase your speed as you get comfortable.
When you hook up, keep jigging through the strike. This drives the hooks in firmly and, just as importantly, lifts the fish off the bottom. Kingfish and amberjack want to dive straight back into the reef and bust you off. Once the fish is solid and taking line, place the rod butt under your gimbal and fight from there. You get far more leverage and save your arms
Fast pitch jigging can be physically demanding, particularly in deep water with heavy jigs. Once a fish is securely hooked and begins taking line, using a gimbal belt can improve leverage and reduce strain on your arms.
The spinning method uses the same principle: drop to the bottom, then pump the jig up as fast as you can through the bite zone. Every angler develops small personal tweaks in rhythm, but the aim is the same, which is to trigger a reaction strike
What Is Slow Pitch Jigging?
Slow pitch jigging is a more controlled technique that uses a specialized rod to make a metal jig flutter, slide, and fall naturally through the water. Instead of relying on continuous rapid cranking, the angler uses the rod’s action to create movement and allows the jig to attract fish as it descends.
Slow pitch jigs are often center-weighted or designed with a particular balance that encourages them to flutter during the fall. Some models have a keel or other shaping that influences how they move through the water.
On the other hand, this technique can be said as one of the best ways to target predatory reef species. Anything that eats bait or live bait will hit a well-worked slow pitch jig. It is not to be confused with mechanical jigging, which uses large, heavy pencil-style jigs and heavier outfits in deeper water
This presentation is particularly useful for bottom-oriented predators, including snapper and other reef fish. It can also attract pelagic species under the right conditions.
Why the Jig Matters
Slow pitch jigs are center-weighted, with the weight in the middle of the body. When you flick the jig up, it flutters back down, which is what predators find irresistible. Some jigs have a keel that makes them flutter to one side, and the trailing assist hooks can resemble a squid. Glow skirts on the assist hooks can add extra attraction.
Two factors decide jig weight: water depth and current.
One simple rule is about one gram per meter of depth, so 135 grams in around 130 meters.
For shallower work, a common guide is 90 to 100 grams in 30 meters and 130 to 150 grams in 50 meters. Other experienced anglers fish 80-gram jigs down to 50 or even 60 meters when the tide allows, because fish take lighter jigs more easily.
If the current is too strong to reach the bottom, step up in weight. The real goal is to keep your line directly below the rod tip. If the line is at a 45-degree angle, the jig is drifting too fast and you lose the slow pitch effect
The distinctive falling action is one of the most important parts of slow pitch jigging. When the rod lifts the jig, the lure gains height. As the angler lowers the rod and allows controlled slack, the jig can flutter or glide back down instead of simply following a tight line.
Many strikes occur during this falling phase. Watch the line carefully because a bite may appear as a sudden twitch, unexpected slack, or a change in the speed of the falling line.
How to Slow Pitch Jig Step by Step
Step 1: Choose the Right Jig
Select a jig based on water depth, current strength, drift speed, and your rod’s specifications. Color can be a useful consideration, but getting the jig to the bottom and keeping it close to a productive fishing zone are often more important.
As a starting reference, some angler suggest approximately 90–100 grams for 30 meters of water and 130–150 grams for 50 meters. Another uses an 80-gram jig in 50 meters when the tidal run is manageable. These examples illustrate why conditions matter: there is no single weight that works everywhere.
Step 2: Rig the Jig Correctly
Connect the leader to the solid ring associated with the assist hooks, rather than relying on the split ring alone. The transcript explains that a split ring can occasionally work free from the solid ring, potentially causing the angler to lose the fish.
Use a suitable knot, wet it before tightening, and pull firmly to check the connection. Choose assist hooks that suit the jig and target species, and use appropriate split-ring pliers when assembling the rig.
Step 3: Lower the Jig Under Control
Drop the jig while lightly controlling the spool with your thumb. This helps manage the descent and allows you to notice a strike before the lure reaches the bottom.
With spinning tackle, monitor the line as it leaves the spool. A sudden stop, unexpected slack, or acceleration may indicate a fish has intercepted the jig. Engage the reel promptly and be ready to set the hook.
Step 4: Use Small, Controlled Rod Movements
Start with short lifts that move the jig a little way above the bottom. Then lower the rod and allow the lure to flutter back down. A small amount of slack during the fall helps the jig move naturally.
A specialized slow pitch rod has a responsive tip designed to work the lure. Avoid forcing the jig through the water with unnecessarily aggressive movements. The objective is to make the jig perform as designed, not simply to move it as quickly as possible.
Step 5: Watch for Bites During the Fall
Keep your attention on the line and rod tip as the jig descends. If the line suddenly goes slack before the jig should reach the bottom, a fish may have picked it up and swum toward the surface.
Reel until you regain contact and respond to the fish. Do not assume every unexpected slack-line event means the jig has reached the seabed.
Long Fall vs. Short Fall Jigging
Long Fall Technique
The long fall technique uses a higher rod lift combined with controlled reeling. The jig rises through the water column before fluttering back down over a longer distance. Monitor the line closely during the descent because that is a common time for strikes.
This method is useful when you want to work the jig across a larger vertical zone while preserving its falling action.
Short Fall Technique
The short fall technique relies on smaller rod movements that make the jig dart, turn, or flutter over a shorter distance. It is useful for keeping the presentation close to the bottom, where many reef species feed.
Experiment with both retrieves. Fish activity, current, depth, and the jig’s design will influence which presentation works best.
Slow Pitch vs. Fast Pitch Jigging Rod Setup
Although both techniques use metal jigs, their rods are designed to perform different jobs.
| Feature | Fast Pitch Jigging | Slow Pitch Jigging |
|---|---|---|
| Primary action | Fast lifts and rapid reeling | Controlled lifts and fluttering falls |
| Common jig style | Long, heavy metal jigs | Balanced jigs designed to flutter |
| Rod characteristics | Powerful rod suited to aggressive jigging | Responsive tip designed to impart jig action |
| Typical targets | Kingfish, amberjack, tuna | Snapper and other bottom-oriented predators |
| Physical demand | Often high | Usually more controlled, but still demanding |
Slow Pitch Jigging Technique Rod Action Guide
For slow pitch jigging, the rod needs to load and recover in a way that transfers movement to the lure. A softer, responsive tip helps produce the intended fluttering action. The rod must also have sufficient strength and lifting capacity for the target species and fishing conditions.
Fast pitch setups generally prioritize the power and durability needed to animate heavier jigs and control strong fish. Always match the rod to the jig weight, line class, and reel rather than choosing equipment by appearance alone.
Slow Pitch Jigging Rod Length and Power Guide
A useful starting point from the supplied transcript is a rod approximately 6–7 feet long with a PE2 line rating for a beginner slow pitch setup. This is a reference rather than a universal rule: rod length, power, and line rating should match the intended jig weight, water depth, target species, and manufacturer recommendations.
The best rod for slow pitch jigging technique is one that gives the jig a natural action, remains comfortable during repeated lifts, and provides enough reserve power to handle the fish you are targeting.
Fast Pitch Jigging Reel Gear Ratio Recommendations
Reel selection should reflect the speed and resistance of your chosen jigging style. Fast pitch jigging benefits from a reel that can retrieve line efficiently while maintaining smooth drag and adequate cranking power. The appropriate gear ratio depends on the reel’s actual line recovery, spool size, jig weight, and the fish you expect to encounter.
For slow pitch jigging, prioritize smooth operation, controlled line pickup, and useful cranking leverage. Some slow pitch reels have specialized handles designed to provide leverage while working the jig.
There is no single gear ratio specified in the supplied transcript. Compare the manufacturer’s line-retrieval figures and choose a reel that suits your technique rather than relying on gear ratio alone.
Choosing a Budget Reel for Slow Pitch Technique
Beginners do not necessarily need the most expensive reel available. A budget reel for slow pitch technique should have a dependable drag, sufficient line capacity, smooth operation, and a frame suitable for the intended fishing environment.
A conventional overhead reel can be a practical choice, while a suitable spinning reel can also perform slow pitch retrieves. Before buying, verify that the reel balances well with your rod and can handle your planned line and jig weights.
Common Jigging Mistakes to Avoid
- Using the wrong jig weight: A jig that cannot reach the bottom efficiently may drift out of the strike zone.
- Ignoring current: If the line angles too far away from the rod, the jig may no longer be working vertically as intended.
- Removing all slack during the fall: A permanently tight line can prevent the jig from fluttering naturally.
- Missing bites on the descent: Watch for sudden slack, line movement, and unexpected changes in sinking speed.
- Attaching the leader incorrectly: Connect to the solid ring associated with the assist hooks and check every connection.
- Ignoring rod-tip wraps: Watch the line as the jig drops. Line wrapped around the tip can damage or break the rod.
- Fishing only one angle: Vary your drift line or fishing position to present the jig to different parts of the target area.
Finding Fish and Managing Current
Successful jigging depends on more than the lure’s action. Use your sounder to identify fish and bait, and pay attention to reefs, drop-offs, and other productive structure.
When the current becomes too strong, a heavier jig may help maintain contact with the bottom. However, if the jig continues drifting too far from the boat, adjusting the drift can be more effective than continually increasing the weight.
To drift jig, observe the boat’s direction and speed using your GPS track. Position the boat up the drift line from the target area, then lower the jig as you travel across the spot. The goal is to keep the line relatively vertical so the jig remains near the target zone. Repeat the drift from slightly different angles when necessary.
Fast and Slow Pitch Jigging for Beginners: Which Should You Choose?
For beginners, the choice depends on the species, fishing depth, available equipment, and personal preference.
Fast pitch jigging is worth learning if you want an active presentation for powerful pelagic predators and are comfortable with a physically demanding retrieve. Slow pitch jigging is a strong starting option if you want to work a lure close to the bottom and learn how controlled rod movements influence its fall.
Start with one technique, practice a consistent rhythm, and learn to recognize how your jig behaves. Once you understand the basics, try the other method and compare the results under similar conditions.
Frequently Asked Questions
1. What is the main difference between fast and slow pitch jigging?
Fast pitch jigging uses rapid rod lifts and reeling to create an aggressive action. Slow pitch jigging emphasizes controlled rod movements and a fluttering fall to attract fish, particularly near the bottom.
2. What weight jig should I use for slow pitch jigging?
Choose according to depth, current, drift speed, and your rod’s rating. It is usually ranges from approximately 90–100 grams at 30 meters to 130–150 grams at 50 meters under certain conditions, while also demonstrating an 80-gram jig in manageable current.
A common starting point is about one gram per meter of depth. Increase the weight if the current stops you reaching the bottom.
3. Can I use a spinning reel for slow pitch jigging?
Yes. The demonstrations explain that slow pitch techniques can be used with spinning tackle as well as overhead reels. Choose a suitable rod and reel combination and control the line carefully during the descent.
4. Why do fish often strike during the fall?
A balanced slow pitch jig can flutter or glide as it descends, creating an attractive presentation. Monitor the line during the fall because bites may show up as sudden slack or an unexpected change in line movement.
5. Do beginners need a specialized slow pitch rod?
A general-purpose rod may be sufficient for learning, but a specialized slow pitch rod is designed to impart the intended jig action. The transcript recommends trying a dedicated rod when possible because its responsive tip can make a noticeable difference.
You can start with a standard rod on a budget, but a dedicated slow pitch rod has a softer, more responsive tip and makes a significant difference.
6. What should I do if the jig keeps drifting away from the boat?
Check the current and the angle of your line. Consider an appropriate increase in jig weight or reposition the boat to drift along the fishing spot. If the current is excessive, drift jigging may help maintain a more vertical presentation.
7. Where should I attach my leader?
Always tie to the solid ring connected to the assist hooks, not the split ring.
8. Can slow pitch jigs catch pelagic fish?
Yes. If you know pelagics are below you, wind the jig back quickly like a metal slice. It works, though these jigs are designed for slow work near the bottom.
Conclusion: Master Both Jigging Techniques
Both jigging styles are rewarding and, once understood, easy to learn. Fast jigging is a high-energy way to target powerful pelagics, while slow pitch is a finesse method that excels around the bottom. Choose your jig weight to suit depth and current, keep your line vertical, and let the jig do the work.
The fast and slow pitch jigging technique gives anglers two different ways to present metal lures to offshore predators. Fast pitch jigging relies on speed, power, and an aggressive retrieve, while slow pitch jigging uses controlled rod action and a natural-looking fall.
To improve your results, match your tackle to your target species, choose a jig that reaches the desired depth, rig your hooks securely, and watch the line carefully throughout the retrieve. Practice long fall and short fall presentations, learn to manage current, and adjust your drift when necessary.
Key Takeaways
-
- Use fast pitch jigging for an aggressive presentation with tackle suited to heavier jigs and powerful fish.
- Use slow pitch jigging to create a controlled fluttering action, especially near the bottom.
- Choose jig weights according to depth, current, and drift conditions.
- Watch the line during the fall because many strikes happen while the jig descends.
- Match rod action, reel performance, and line ratings to your technique and target species.
- Practice consistently and adjust your presentation based on what the conditions and fish tell you.
- Fast jigging uses heavy knife jigs and a fast lift-and-wind for pelagics.
- Slow pitch uses center-weighted jigs that flutter on the fall for bottom fish.
- A 6 to 7 ft, PE2-class specialized rod is a solid slow pitch starting point.
- Use about one gram of jig weight per meter of depth, adjusting for current.
- Keep your line vertical and maintain slight slack on the fall.
- Always tie to the solid ring, and use drift jigging in strong current.
